MAIN) MFM on AWS Installation Guide
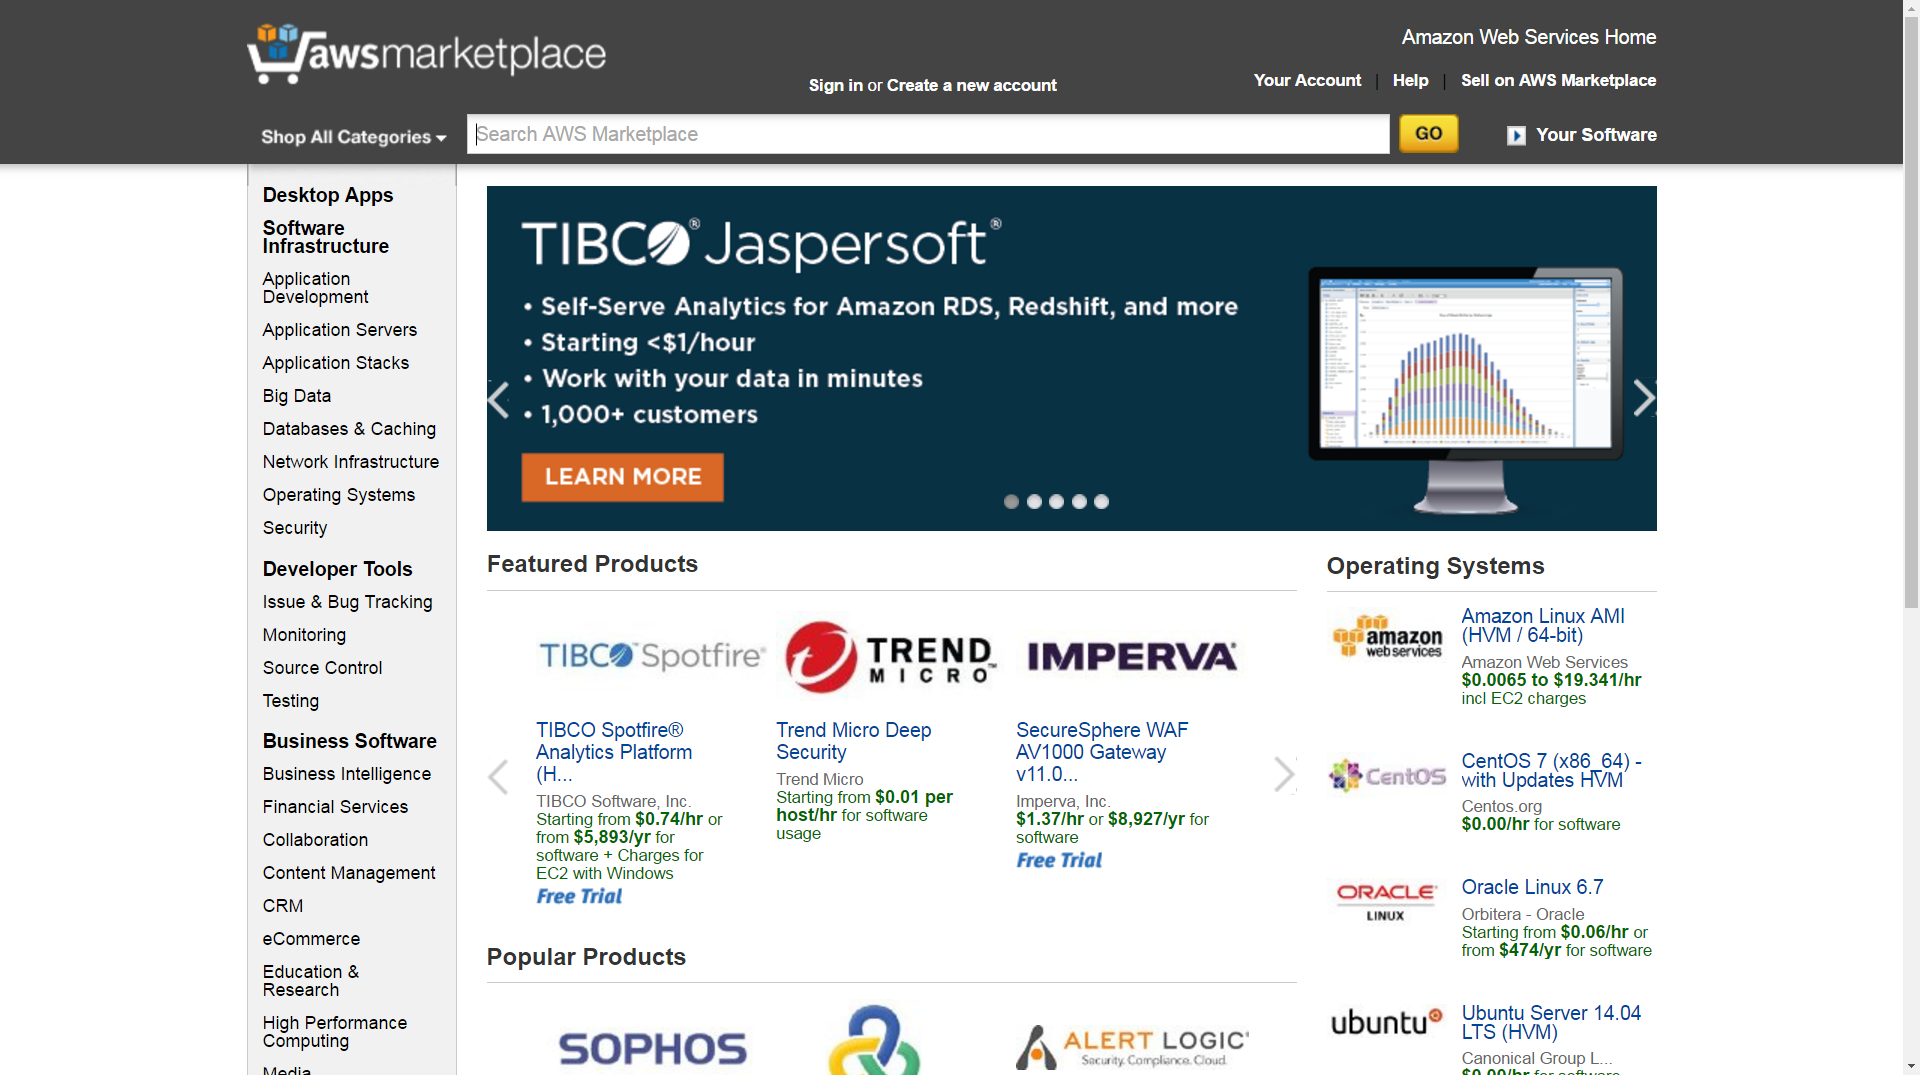
(1) Go to amazon Marketplace homepage.
https://aws.amazon.com/marketplace
(2) Search “MFM”
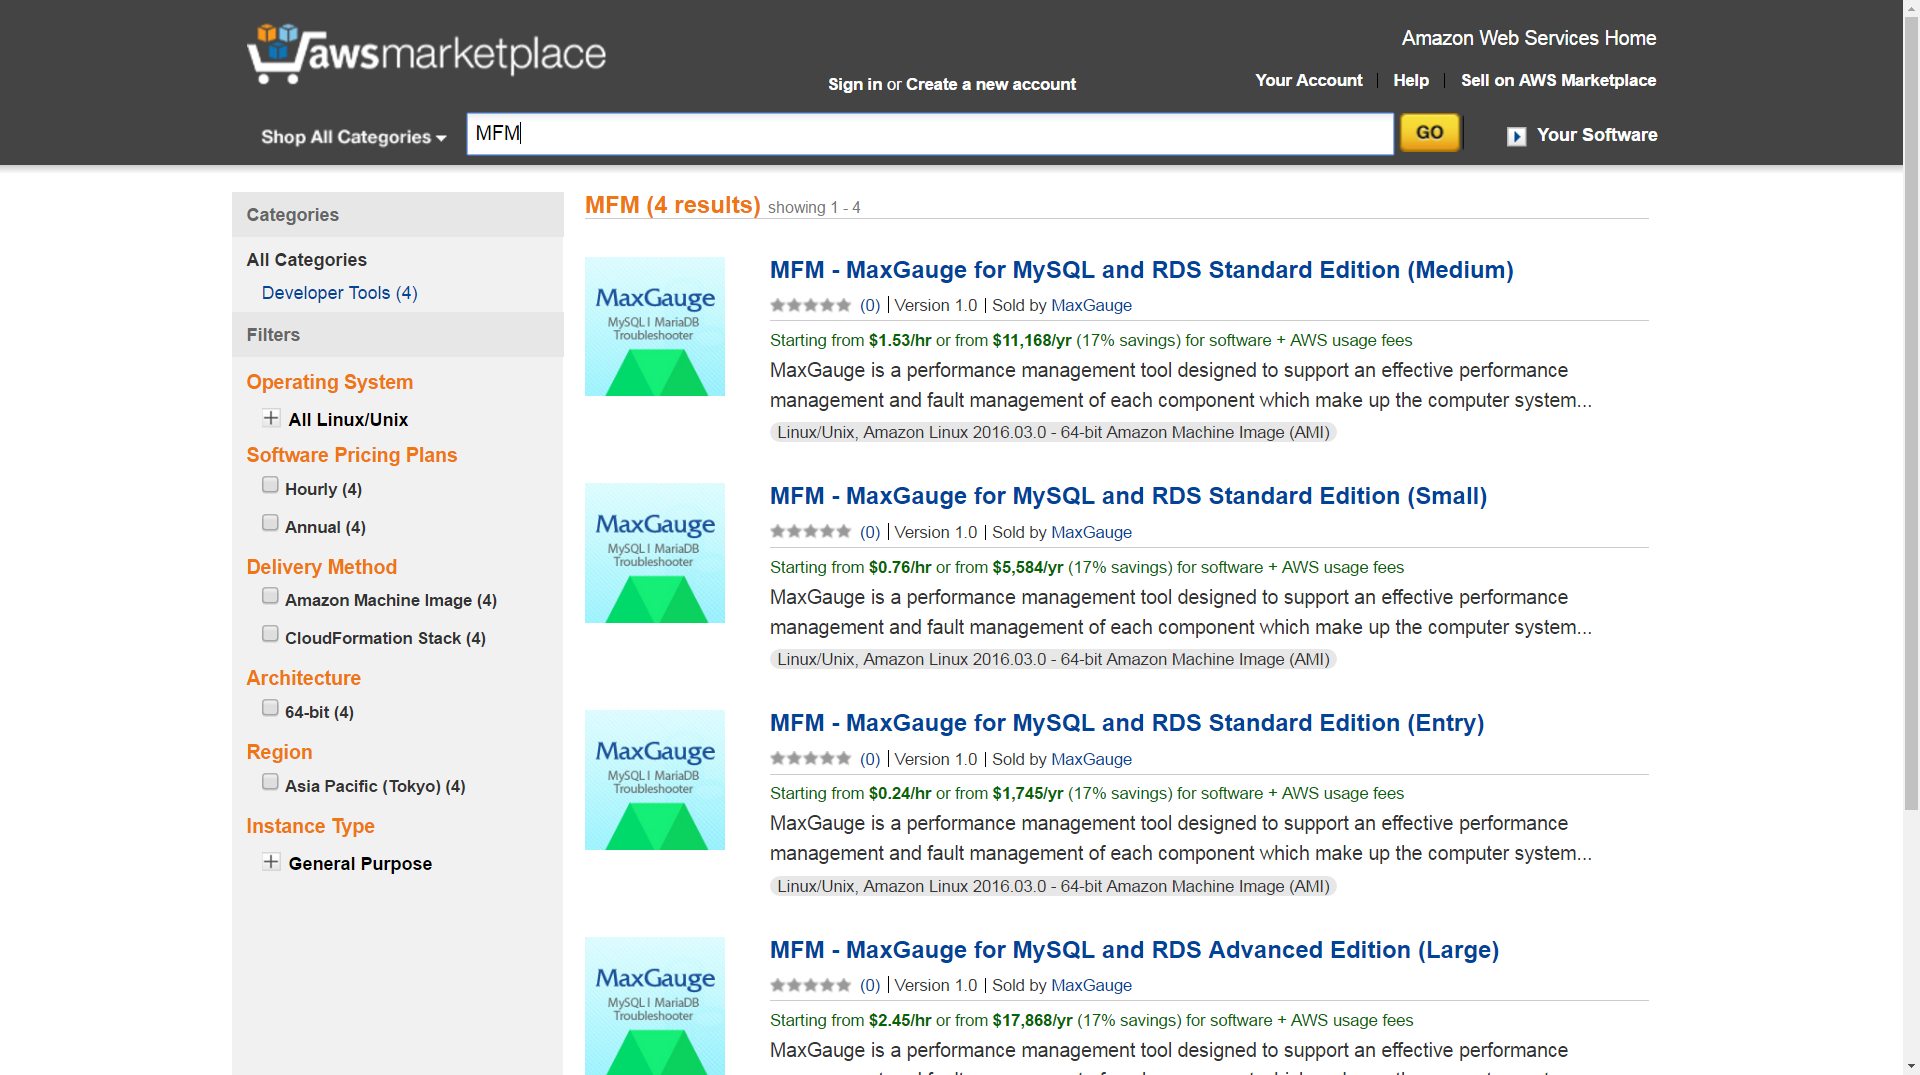
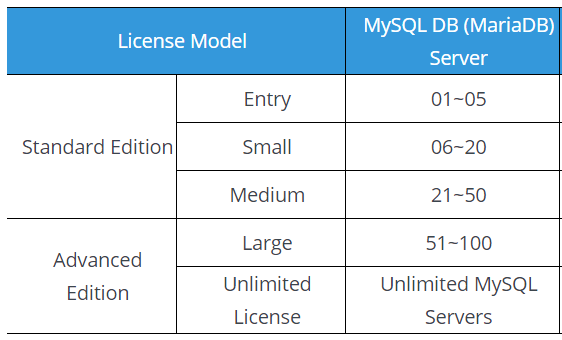
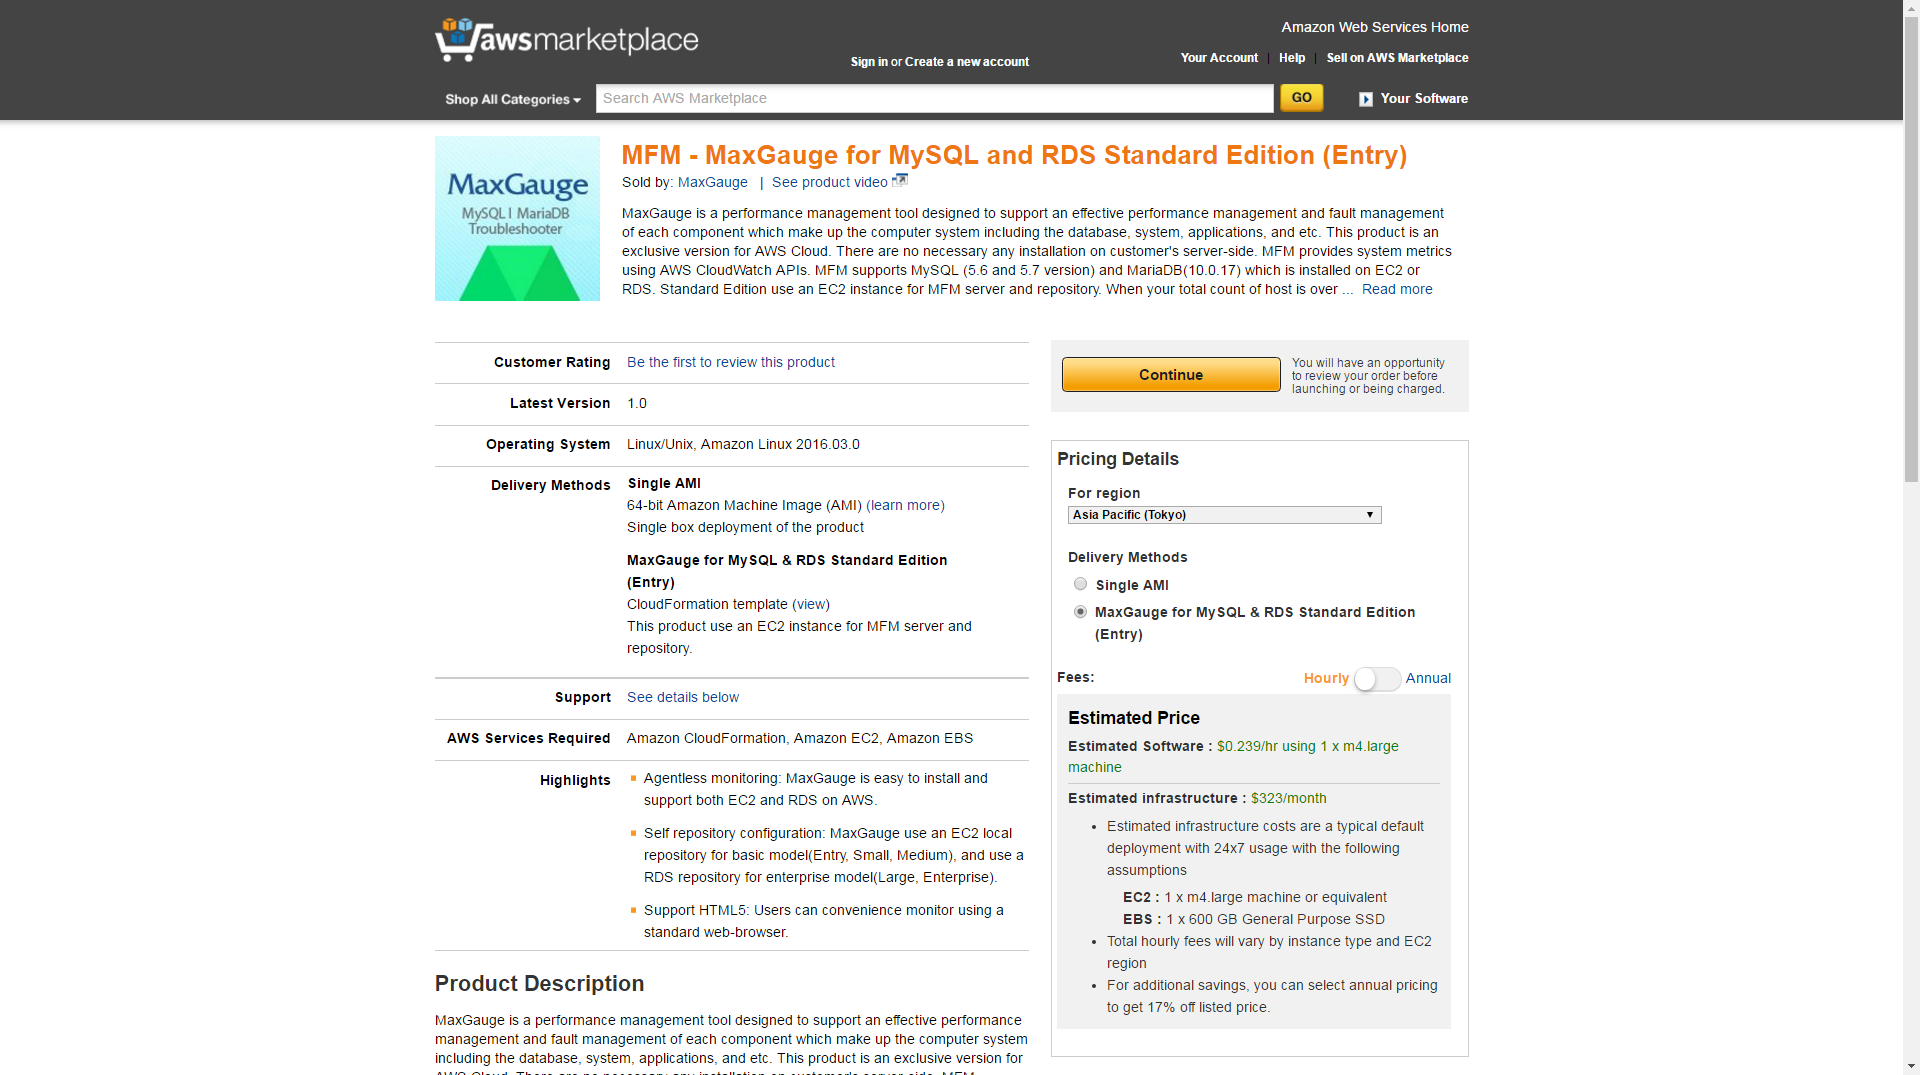
(3) Choose an appropriate product which matches your server numbers.
(4) Choose Delivery Methods
– Please choose “MaxGauge for MySQL&RDS Standard Edition(Entry)” not “Single AMI”.
– Click “Continue”.
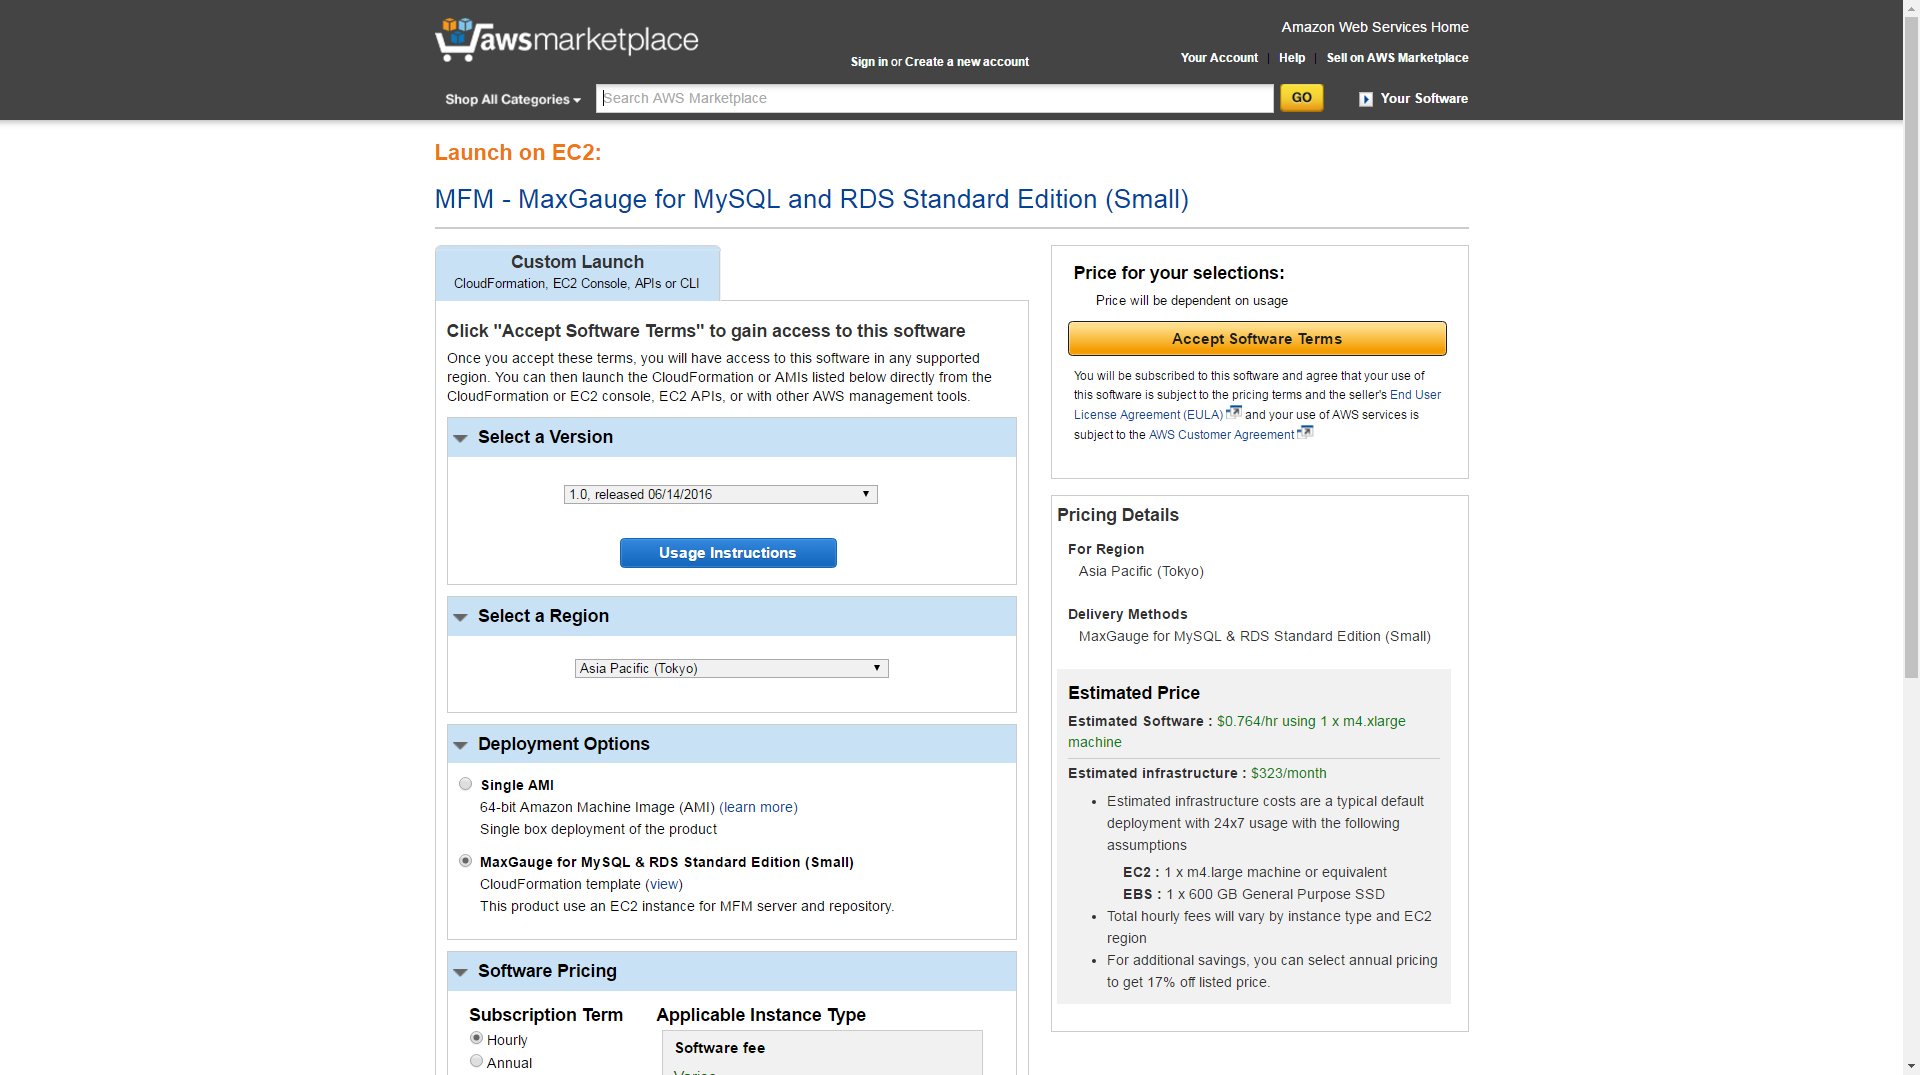
(5) Click “Accept Software Terms”.
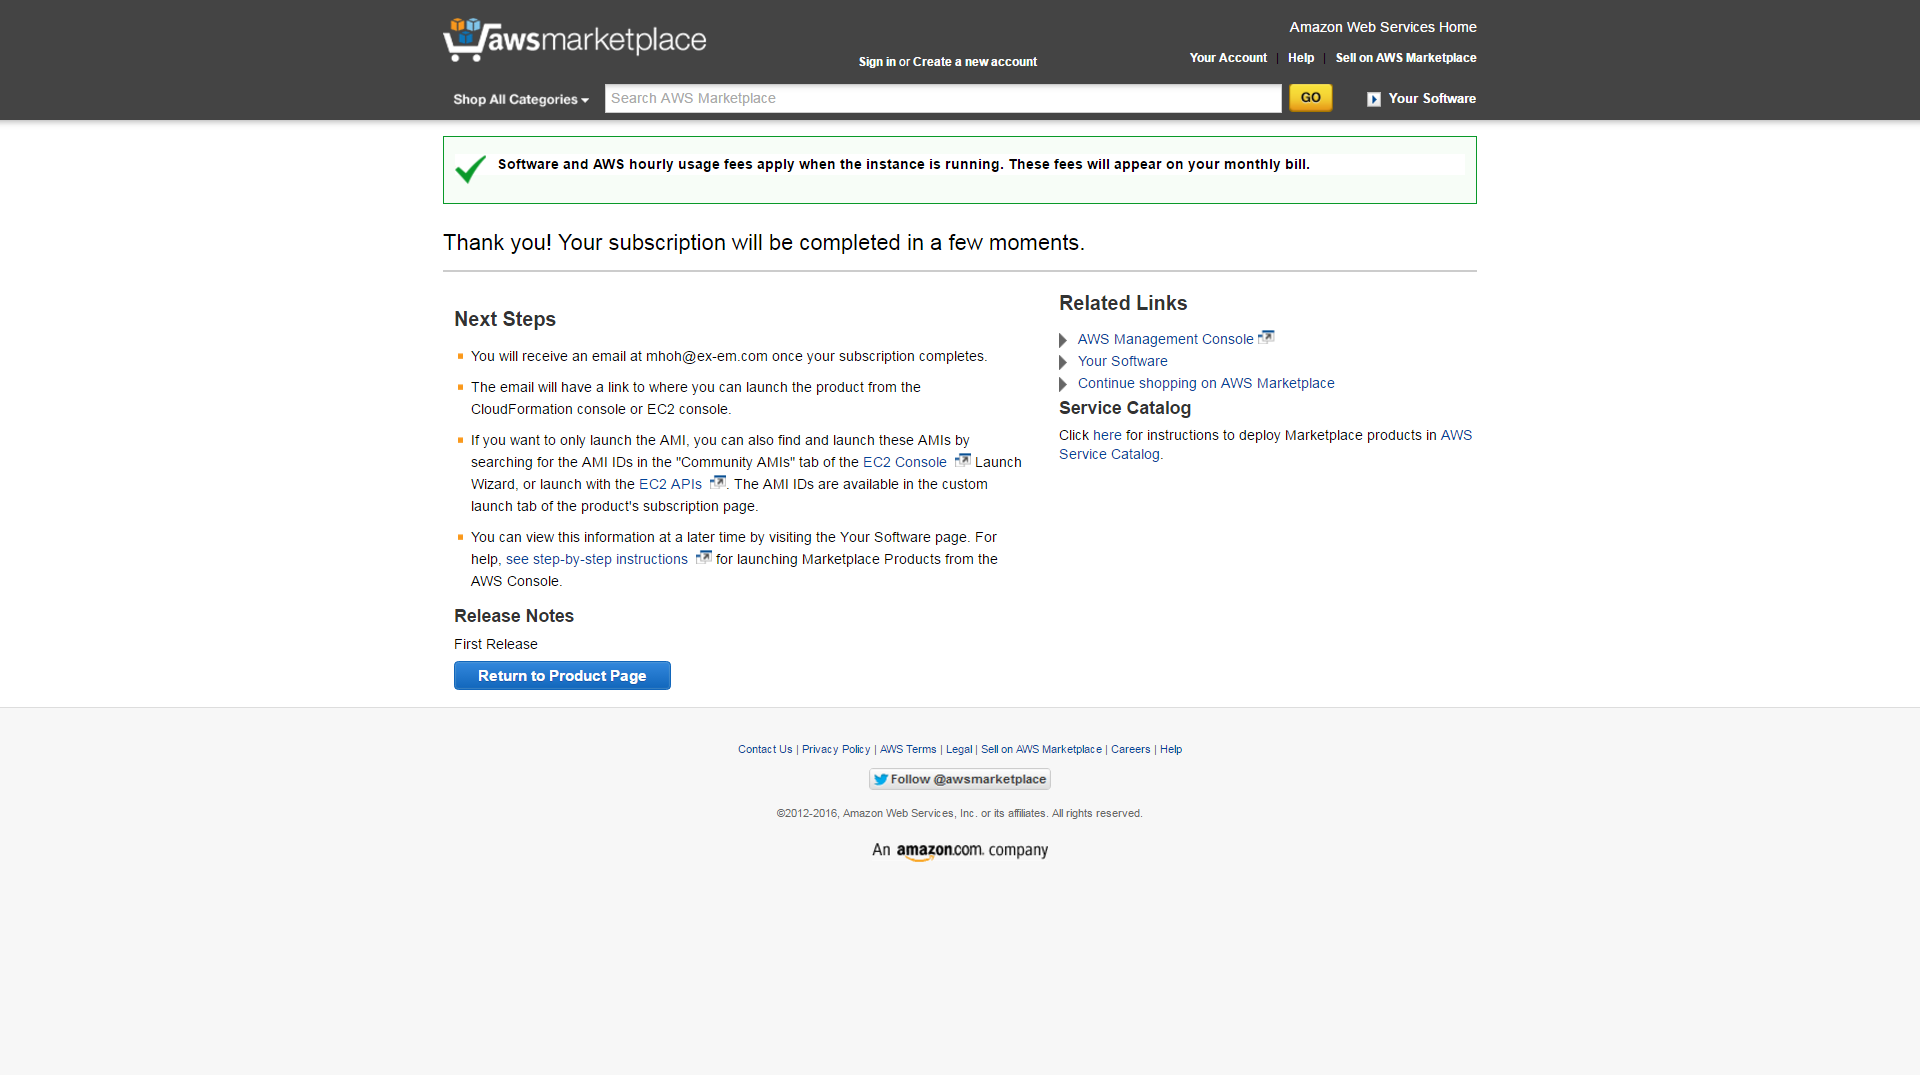
(6) If the page below occurs, click ”Return to Product Page”.
(7) Click “Launch with CloudFormation Console” at the bottom of the page.

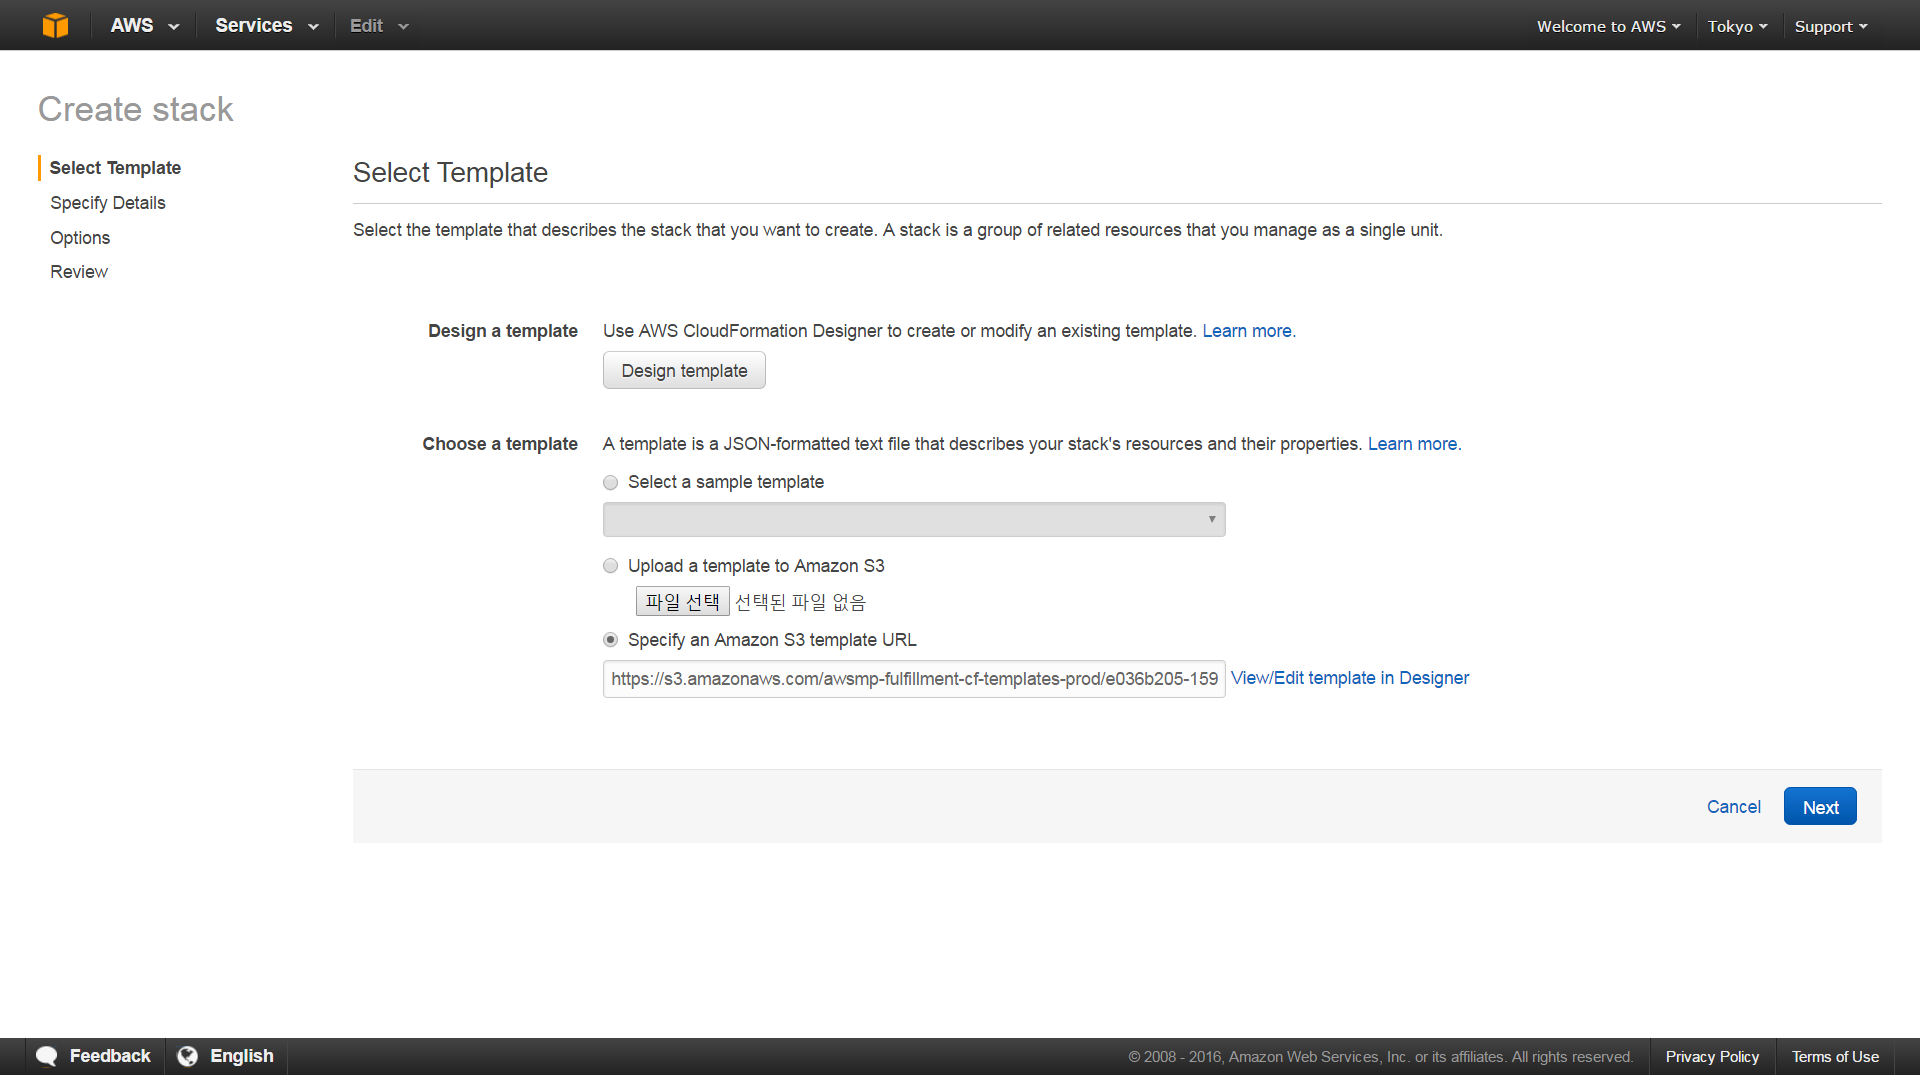
(8) Choose the basic template and click “Next”.
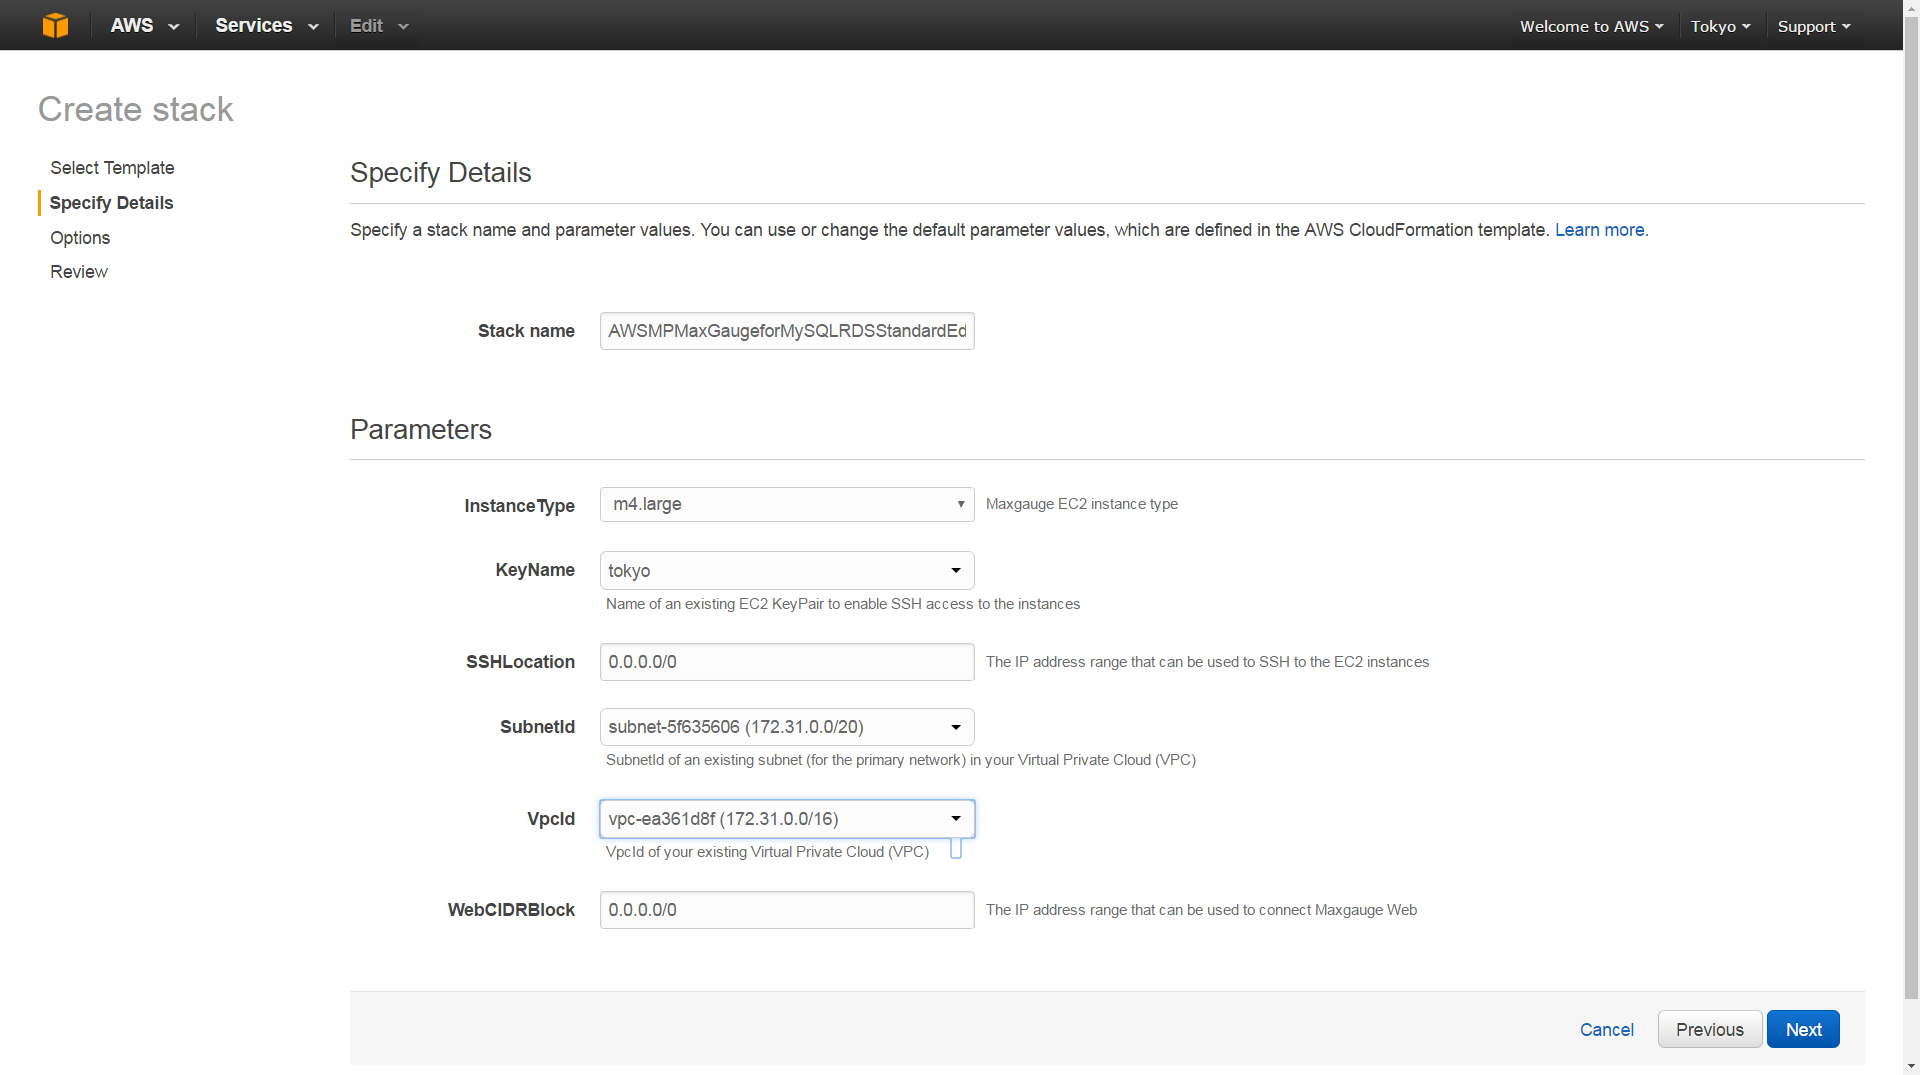
(9) Enter information below in “Specify Details” page.
– KeyName : choose the keypair which is used for access already existing ec2 ssh.
– SSHLocation : enter 0.0.0.0/0 if you want to SSH log in ec2 server everywhere.
– SubnetId : Choose the one that already existing.
– VpcId : Choose the one that already existing.
– WebCIDRBlock : 0.0.0.0/0 (If you want to access MFM every where, just keep it)
(10) Keep the existing value on Options page and lick “Next”.

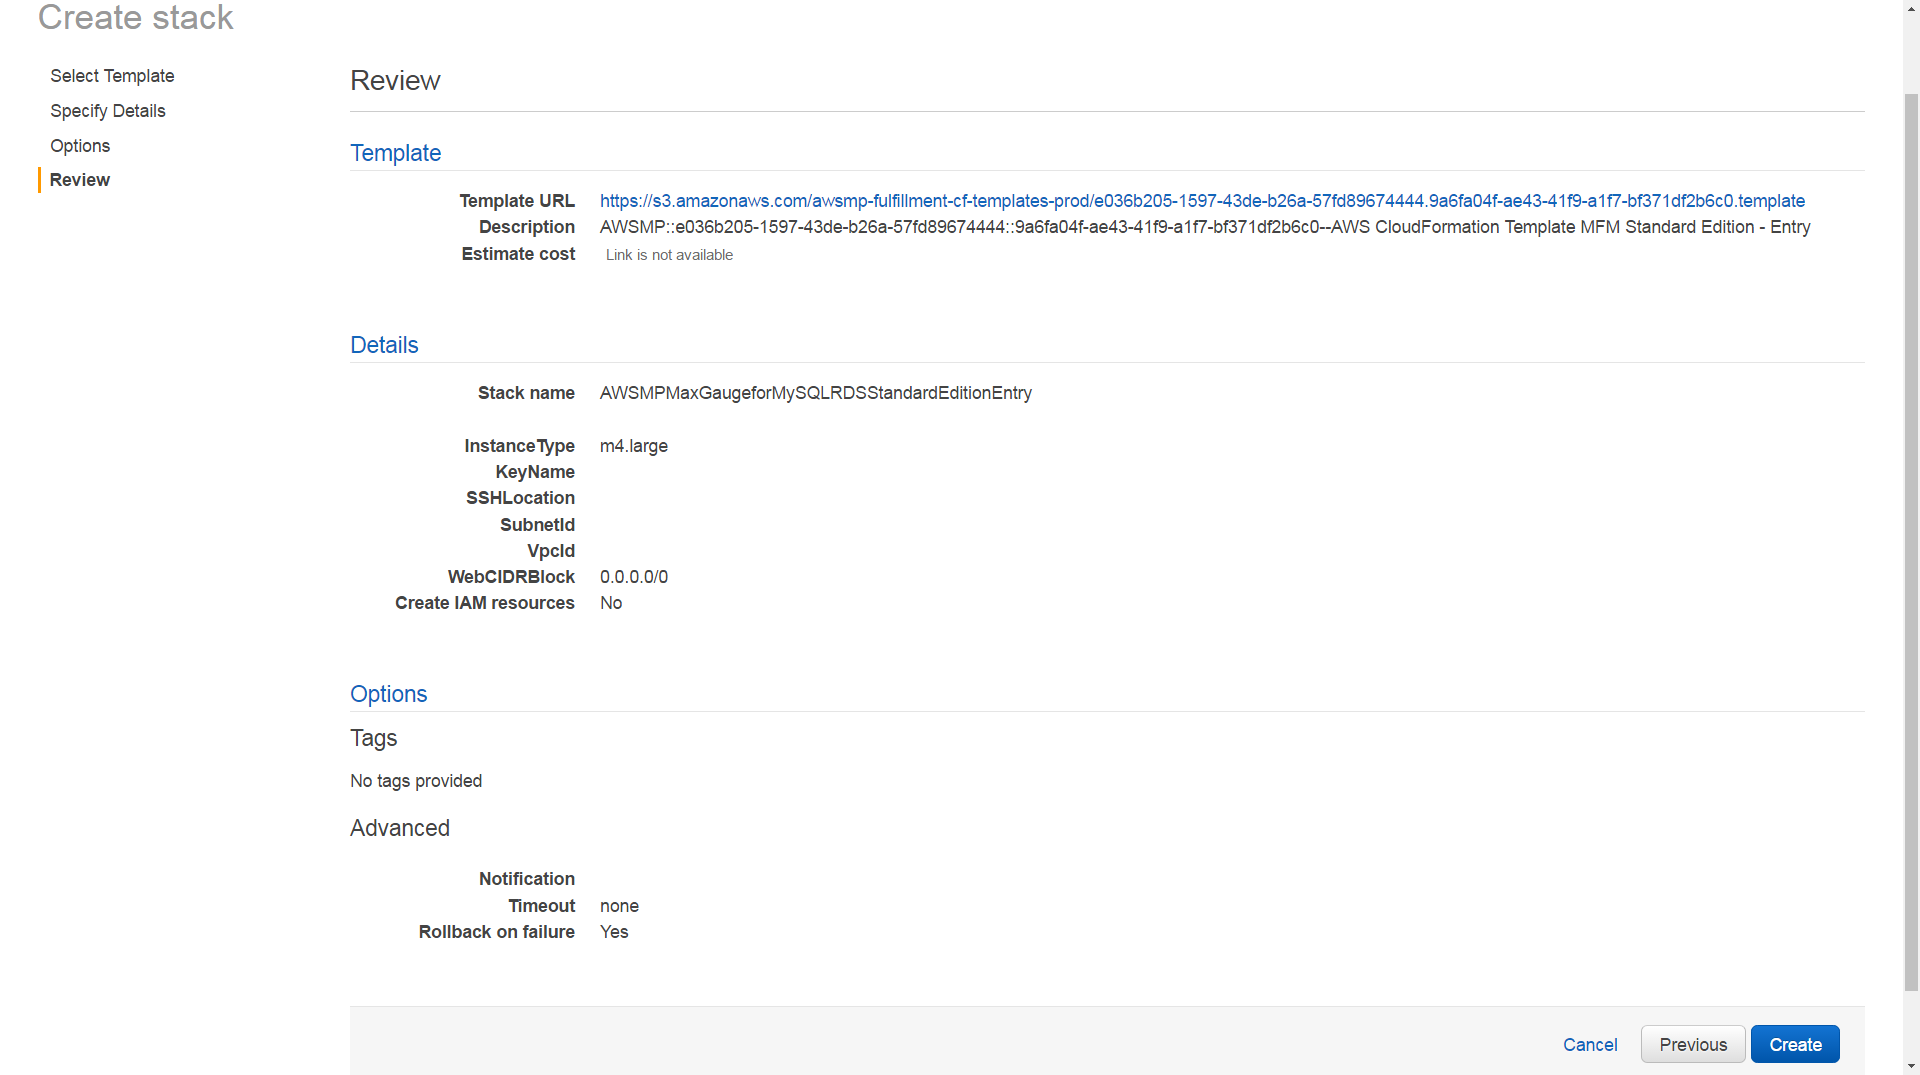
(11) Check all the information in Review page and click “Create”.
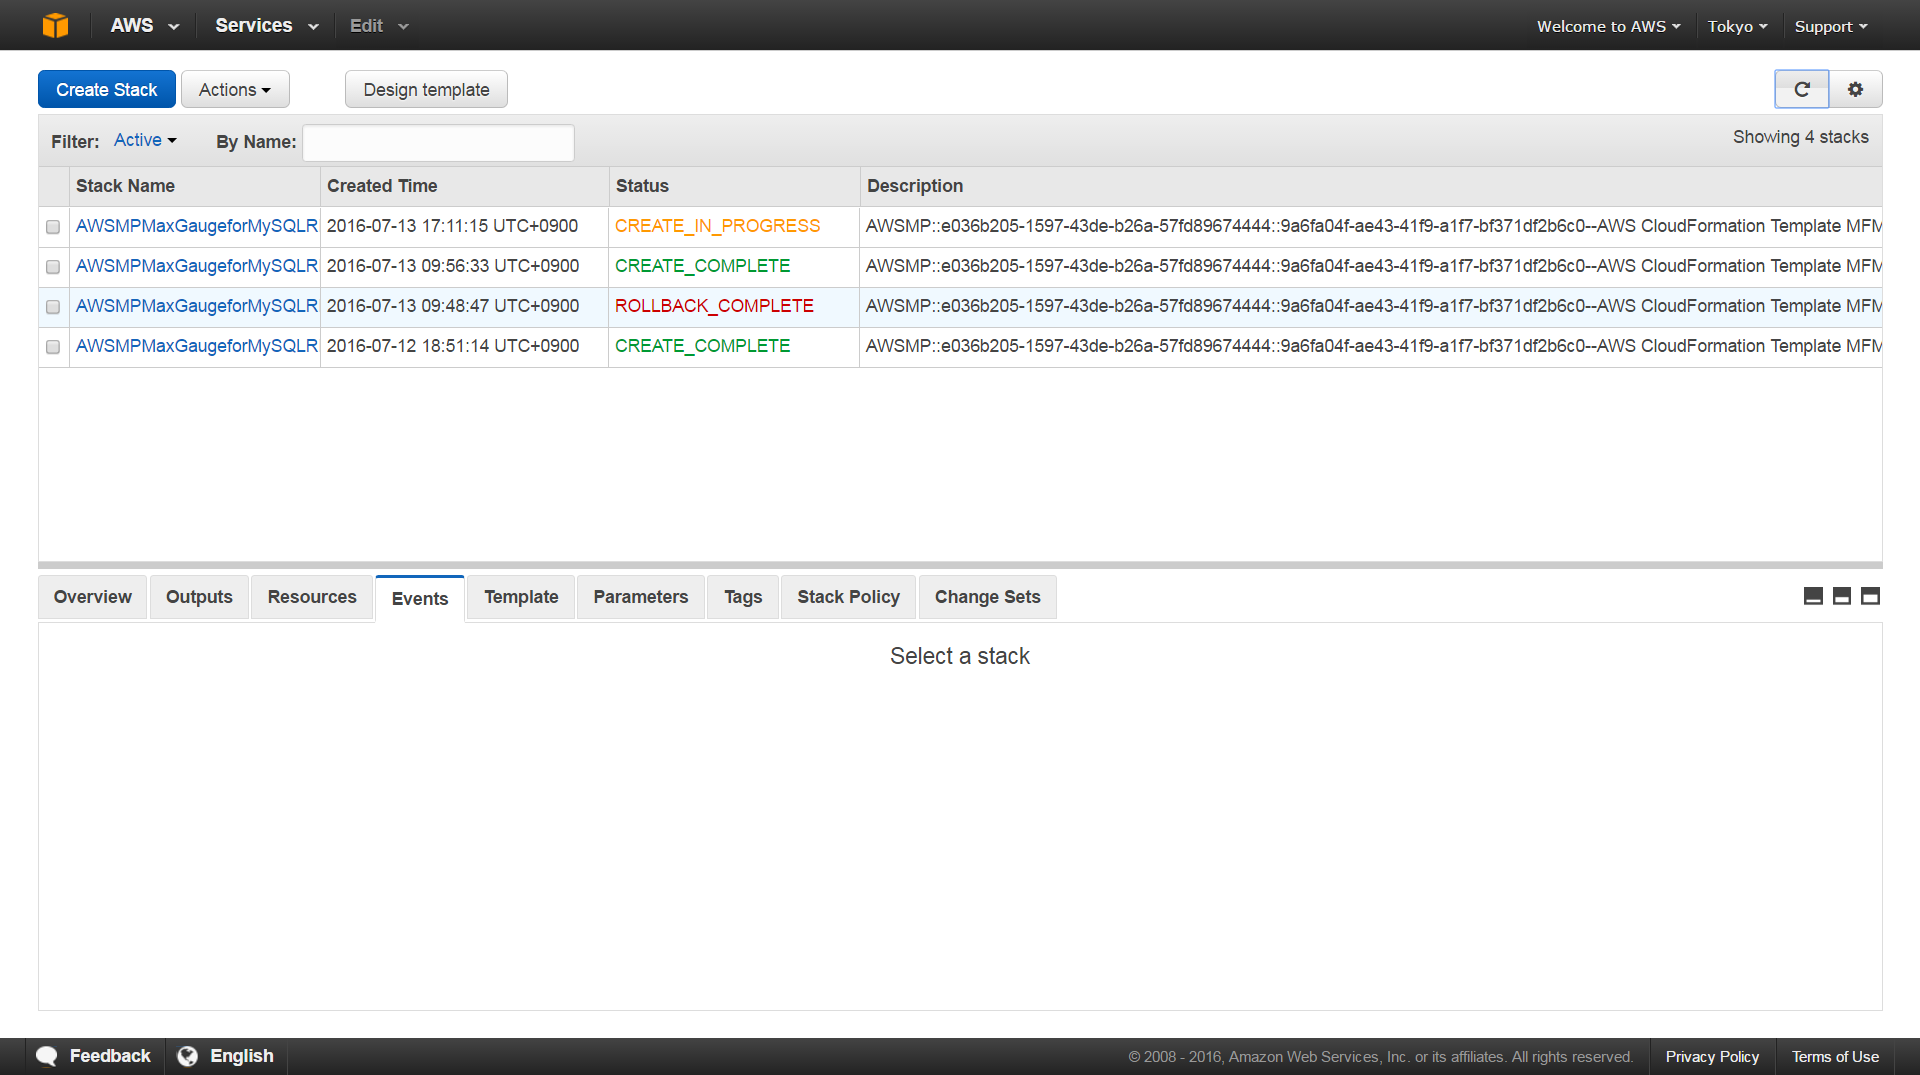
(12) MFM on AWS creation status is offered.
– When creation is finished, status will change to “CREATE_COMPLETE”.
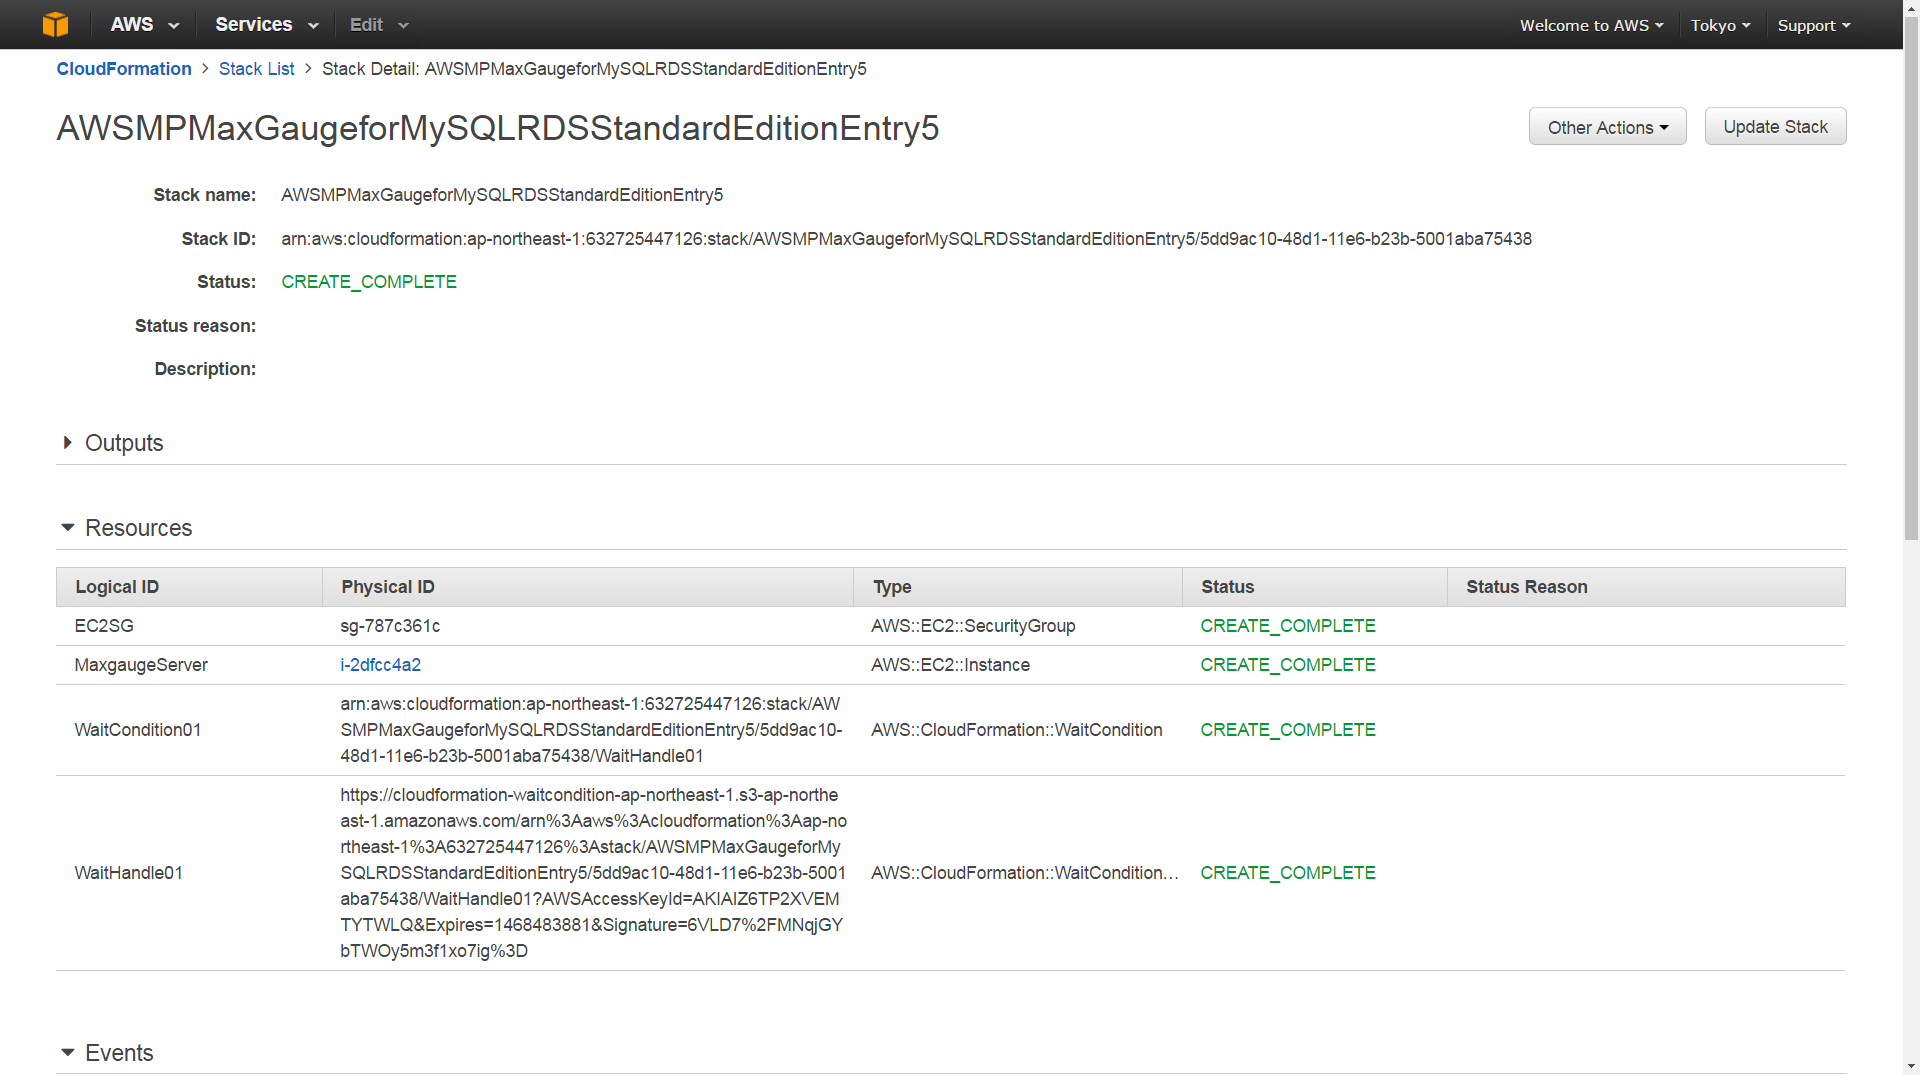
(13) Click “Stack Name” link, creation details will be offered.
– Click “Resources” and chech the details.
– Click “Pysical ID” of MaxgaugeServer which is colored in blue.
(14) MFM EC2 Server has been created.
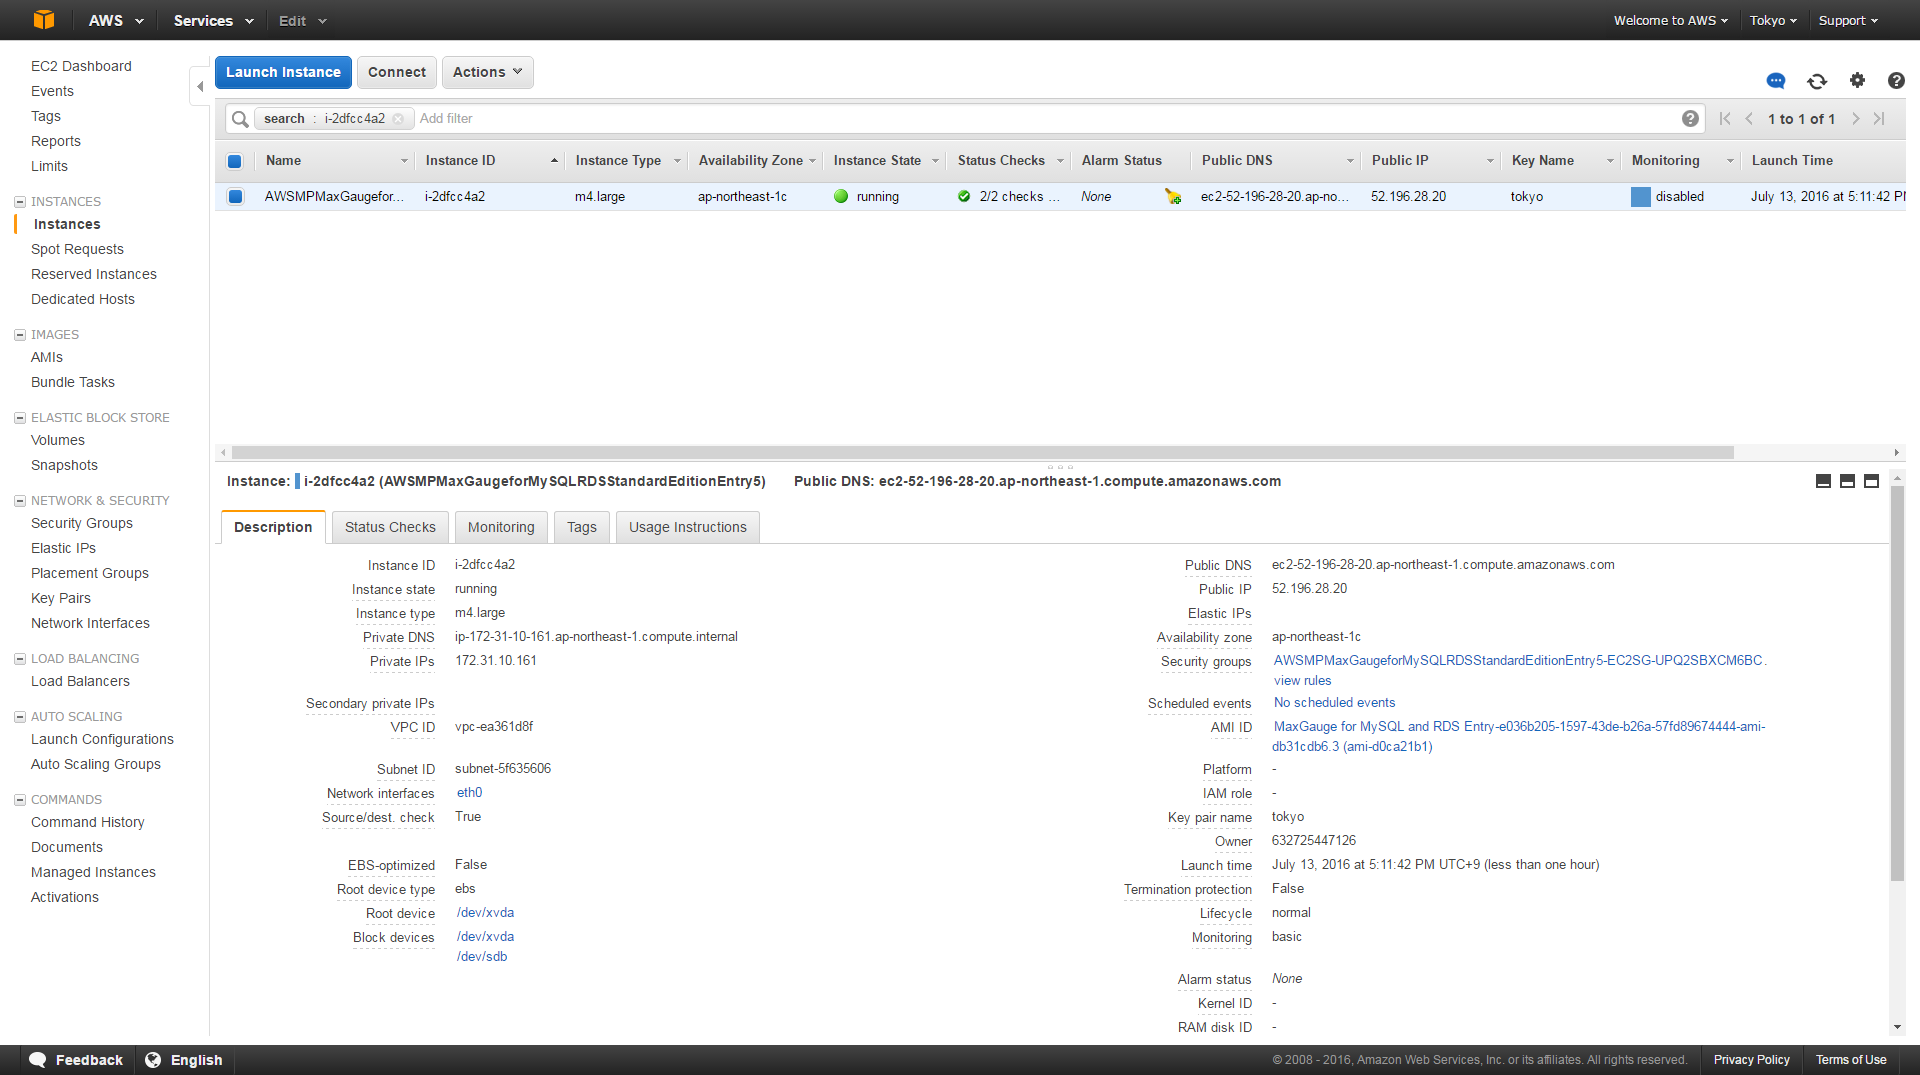
(15) Use Public IP Address to access MFM Server.
http://xxx.xxx.xxx.xxx:8170
ID: Administrator
Password : EC2 Server instance id value
(16) When you see the MFM Management page, choose “Server” setting and register DB which needs to be monitored.
– Click “Add” to finish adding server.
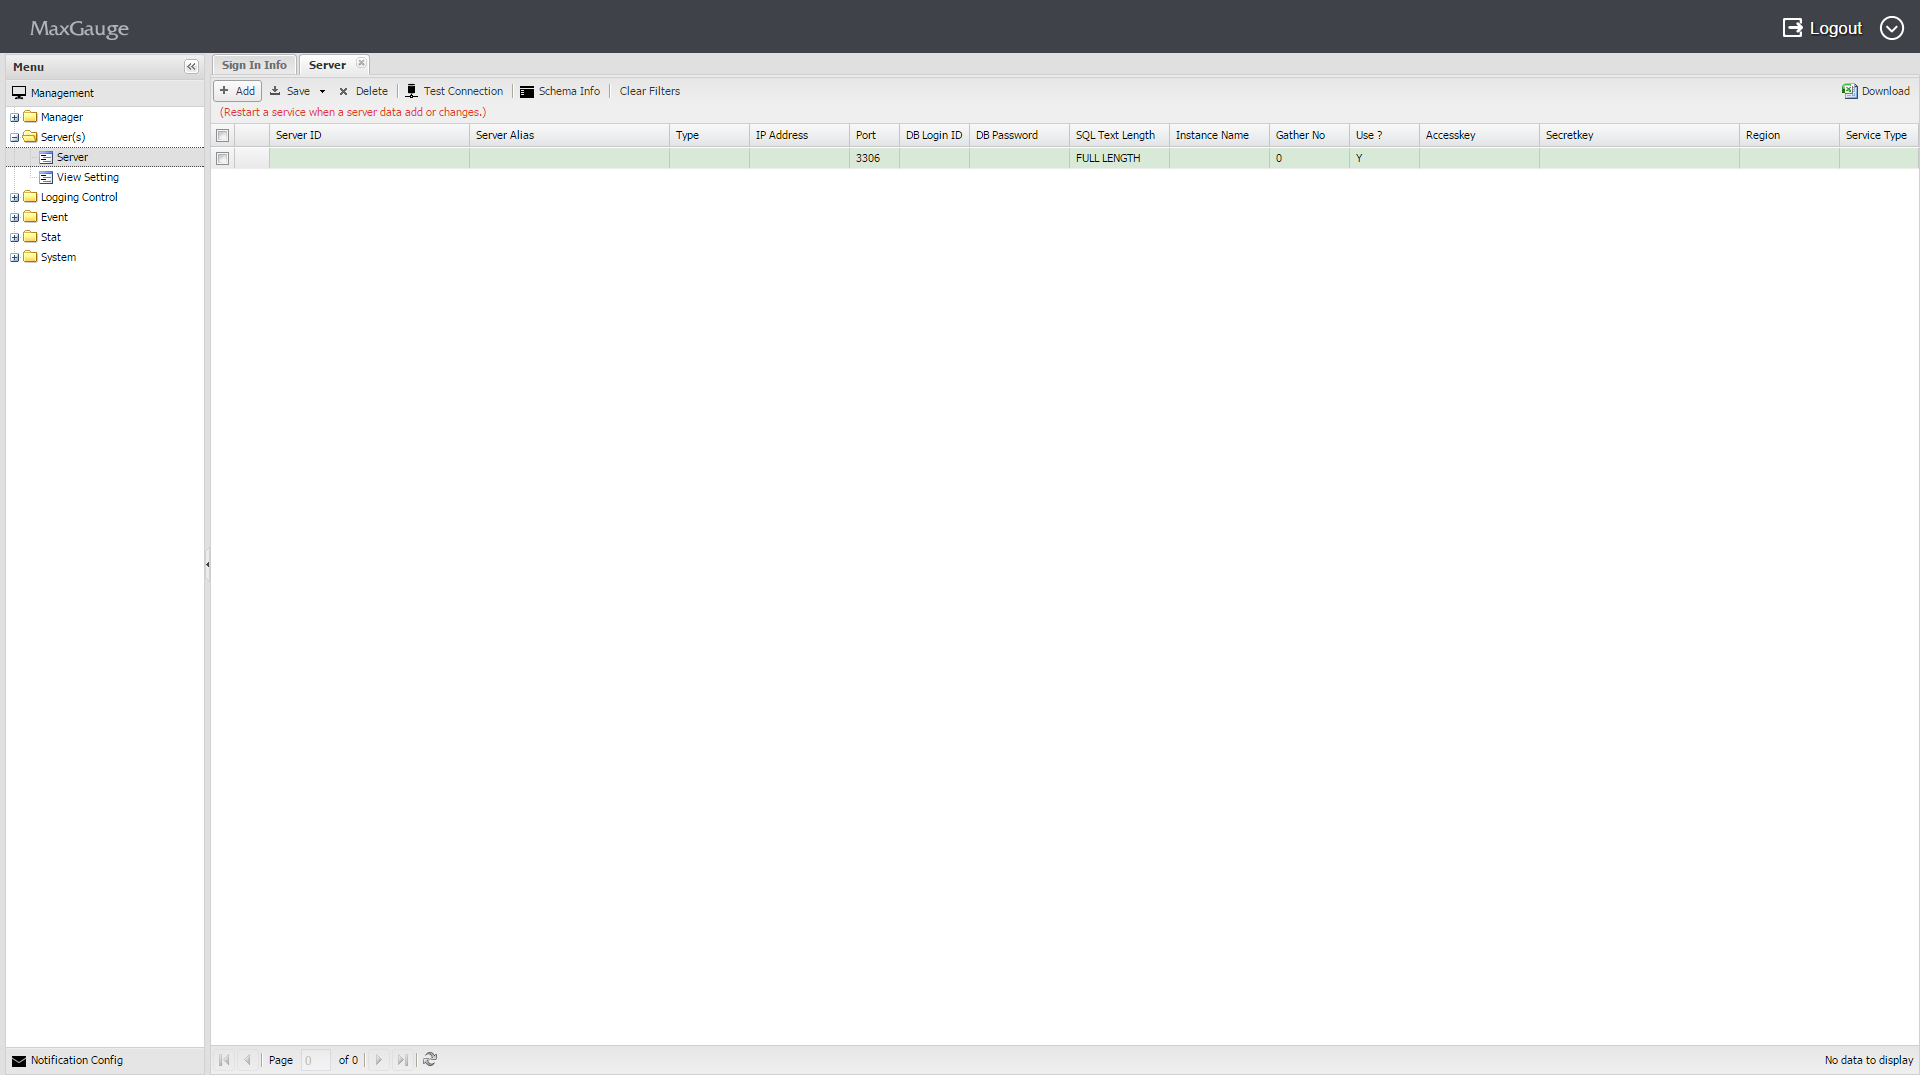
– Input value is as below.
[mysql DB Monitoring Info]– IP : inter mysql Server IP
– port : default 3306
– select db user id/password which has authority
. Create MFM access user for target DB and grant select permission. “%” below should be defined to MFM server IP that was accessed.
CREATE USER ‘mfmuser’@’%’ IDENTIFIED BY ‘password’;
GRANT SELECT ON performance_schema.* TO ‘mfmuser’@’%’; // mark Performance schema
GRANT SELECT ON mysql.* TO ‘mfmuser’@’%’; // mark information like DB Parameter
GRANT REPLICATION CLIENT ON *.* TO ‘mfmuser’@’%’; // mark replication client information
GRANT PROCESS ON *.* TO ‘mfmuser’@’%’; // mark process list information
FLUSH PRIVILEGES; // save permission information
– Service Type : RDS or EC2 : Choose
– Set target security group inbound: DB should be accessed through MFM Server IP (default port 3306)
[AWS IAM user creation and info offering is necessary for Cloud Watch]
– instance name : in the case of RDS, it is RDS DB instance Identifier TARGET DB
In the case of EC2, it is EC2 Instance ID which is created by Target DB.
– AWS Region:
– aws IAM user access key, secret key,
– aws user should have permissions below:
. CloudWatchFullAccess
. AmazonEC2ReadOnlyAccess
. AmazonRDSReadOnlyAccess
(17) Save all your settings and click “Test Connection” to check the connection.
(18) When the connection is successful, SSH login in MFM EC2 Server and restart the service.
– apply the 2 shells.
# /home/ec2-user/maxgauge/bin/all.stop.sh
# /home/ec2-user/maxgauge/bin/all.start.sh
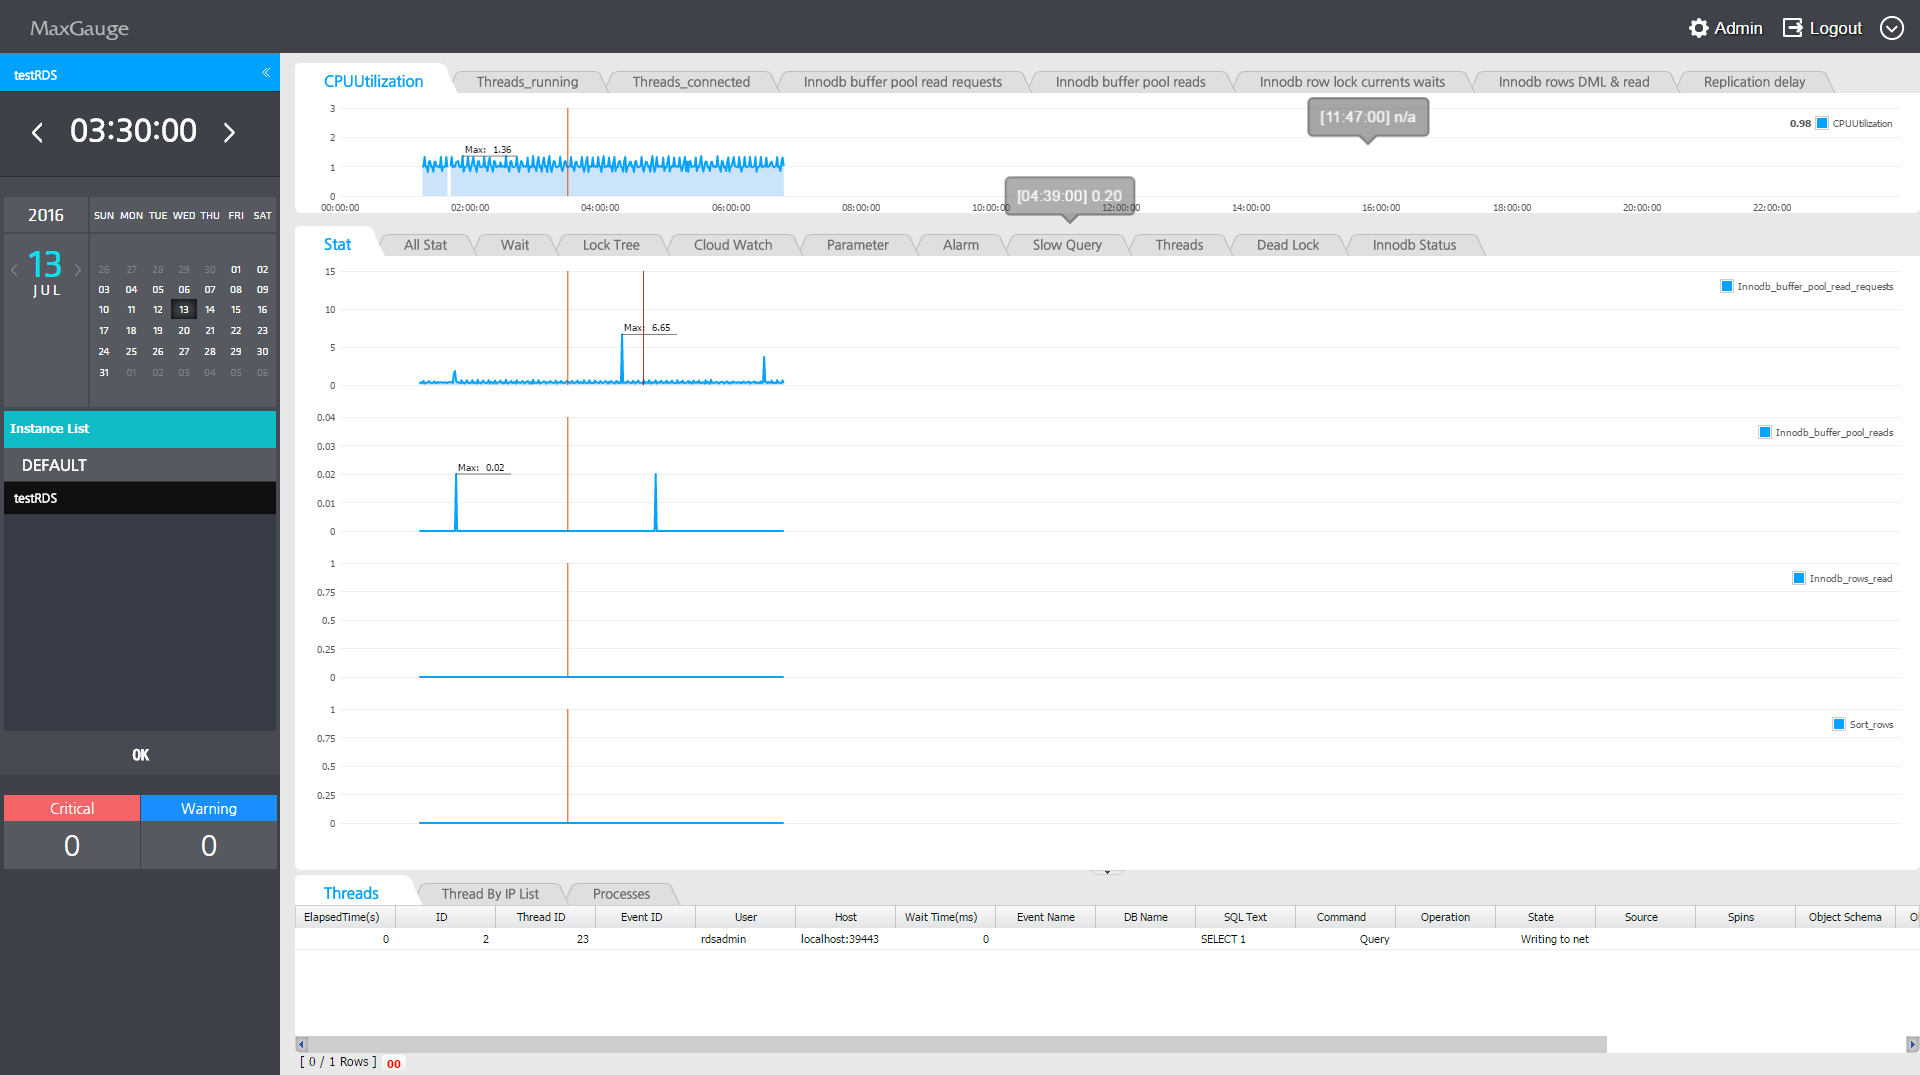
(19) Log in MFM on AWS and start to monitor.